Recycle, Reduce, Reuse.
How to make a DIY Children's apron from old clothing.
That is a very important motto in our house. From recycling everything down to the envelopes mail arrives in- to refusing to throw out old clothing - no matter how stained. I have a closet full of clothing in various sizes, patterns, etc. that I have picked up over time from thrift store clearance racks... as well as clothing I have stained myself. It happens more often than you think.
I have been dying to find ways to use these items. I have made hair items, pillows, and new clothing items from them. But what to do with the awkward stained/ripped items!? Then It hit me. APRONS. Not just any aprons - Children's Aprons!!! My best friend has the most adorable little girl.. and I have been dying to make her something - this was my chance!
My first try? Not such a good one. I made the top too long. And the stitching was horrible. I literally have ZERO training in how to sew. I picked it up about 2 months ago -and have been trying since... it has been coming to me over time. But the art of getting a straight even line is the death of me.
Any who - I tried again. Um, yes Look at this vintage style Beauty!? Which came from a dress (the white lace portions) and a wetseal shirt with a stain (by me!) on the front. And look at this Tres Adorable photo of my best friends little girl rocking it!?
After finally figuring it out - here you go. My first try at a step by step how to sew something blah blah blah tutorial. Here is a photo of the before and after of what I am about to show you how to make:

Please, again, keep in mind - No formal training. Anyone who is proficient in sewing may cringe at this project. But, what works for me - works for me! Also, steps may very based off of the clothing item you picked. Shirts are easiest!
I began by ripping all of the seams from the straps, tie belt, buttons, etc. Set aside.
Next, I ripped the seams on the sides of the shirt to make it into two separate peices.
After it was all said and done, I ironed all of the pieces for easier sewing and appearance. Then I laid all of the pieces together for a visual idea of how to sew it together again.
Next, I folded the front piece perfectly in half and drew a line for where I wanted to cut. I tried to visualize it as a square for the top part of the apron, and a rectangle for anything below the tie belt. Then, I cut!
Here is how she looks after cutting the 'square' out. You can easily measure from shoulder to waist of whomever will be rocking this and measure/cut accordingly.
Step 1 for sewing was to attach the straps. I pinned each equal distance from the seam. I did a 'Square' around the edges of the portion connected to the top.
Next, I cut the frill off the back of the back piece of the top. I left enough fabric to layer it behind the existing one on the front of the top. I pinned it about an inch above the existing seam of the other frill.
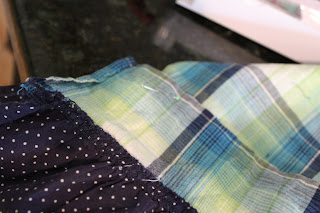
I sewed the two together by sewing exactly at the existing seam on the front to hide the new seam of the extra frill. Much easier than seam ripping it and starting from scratch.
Loved the layered look!
Then I flipped it over and trimmed down any excess fabric.
Next, I began to pin the seams. I planned to do a 1/4 inch basic seam so I pinned accordingly.
And the sewing began... an exact 1/4 inch seam.. removing pins along the way.
After I finished all of the edges.. I places my original straps across the center portion to use as the tie waist... It originally had button holes so I placed those in the middle overlapping them slightly - with the intent to sew the buttons into the middle as embellishment.
A little snipping of strings, some sewing of tie ends, etc. - ad we were done! A shirt - made into a child's apron!
A little snipping of strings, some sewing of tie ends, etc. - ad we were done! A shirt - made into a child's apron!
The backside:
Hopefully that helps - and the further I get into this blogging thing the better I get at explaining/photos.
Questions? Ask away! I will do my best to help!
Sincerely,
Kristin


OMG she's such a little doll! I think these are awesome Kristin! I'm also self taught when it comes to sewing and I can tell you, the more you do it, the easier it gets!
ReplyDelete