
An adorable, easy way to keep that meaningful receiving blanket forever - and in a beautiful home decor manner!
A receiving blanket upcycle tutorial! Great gift for mothers :)!

This is what we are making today!
Let's face it. If anyone here is a mother.. then you know the importance of baby's first outfit. Or baby's receiving blanket that he was first wrapped in...and the baby blanket! The super soft, delicate baby blanket. They are an amazing representation of the little man (or lady!) your child used the be. The memories that go along with it are priceless... and admittedly, it is hard to part ways with those pieces of someone to important in your life.
I have seen many framed baby outfits and articles around the web.. but they are just NOT my style. So I began to ponder how I could use them in my home without drawing too much attention as, lets face it, those pieces are important to my family only.
After many failed painting attempts, I was really racking my brain trying to decide what to do with a pair of kohl's framed artwork I had picked up at a garage sale for $3 each (originally $39.99 each!). I gutted the insides completely. Sorry whomever painted the pictures.. I just really loved the frames!
Then my husband said the smartest thing "why do you do like others on pinterest have and use fabric in the back?"
DUH!

(This is the original frame and artwork)
Then it all came together. Those receiving blankets I sadly placed in our donation bin - just became my fabric for the artwork in our hallway!! I had two photos laying around and decided to use them. Your size color and pictures depends on your taste ;).
What you need:
A picture frame
A piece of cardboard that fits perfectly in the frame (I used the piece that came inside of it originally)
A receiving blanket in any print
A photo of your size and picking (preferably of the little one wrapped in said blanket!)
Decorations to trim the photo with (using pieces of the baby blanket is a GREAT idea! Or even pieces of baby's clothing, lace hairbands, etc.)
Glue. Hot glue would work here. I used Allene's All purpose fabric glue.

(My receiving blanket I used. I decided to do away with the little elephant. )

Using the cardboard that fits in the frame, place the receiving blanket under it, with the backside facing use. Roughly cut out the shape of the cardboard (using it as a guide), leaving space to glue it to the cardboard.

No need to be exact here. Nobody will see the backside.

Using your glue, making a thick line and firmly push fabric edge into the glue. As you go around the edges, 'tug' on the fabric to give it a firm, taunt fit.

There really is no right or wrong way to do this. Just as long as you are able to remove wrikles you will be fine. Your finished product should look something like this:


Now take your picture, and cut it down to size to fit. I had a 12x12 cardboard, so I decided to make the photo 4x4. A bigger photo would work just fine - it all depends on the size of the frame you use!

Next I measured to center it perfectly in the middle of the blanket.

Then I added a dab of glue to each corner to hold it down to the fabric.

Once the picture is firmly in place, you can begin to add your embellishments. I ended up using some vintage lace I cut from a bed skirt my MIL and left me.

I measured out the panels and cut accordingly. Next, apply a strip on glue half on the fabric, and half on the actual picture.

Then we attach the pieces, firm placing and pulling the fabric to make it a straight line.
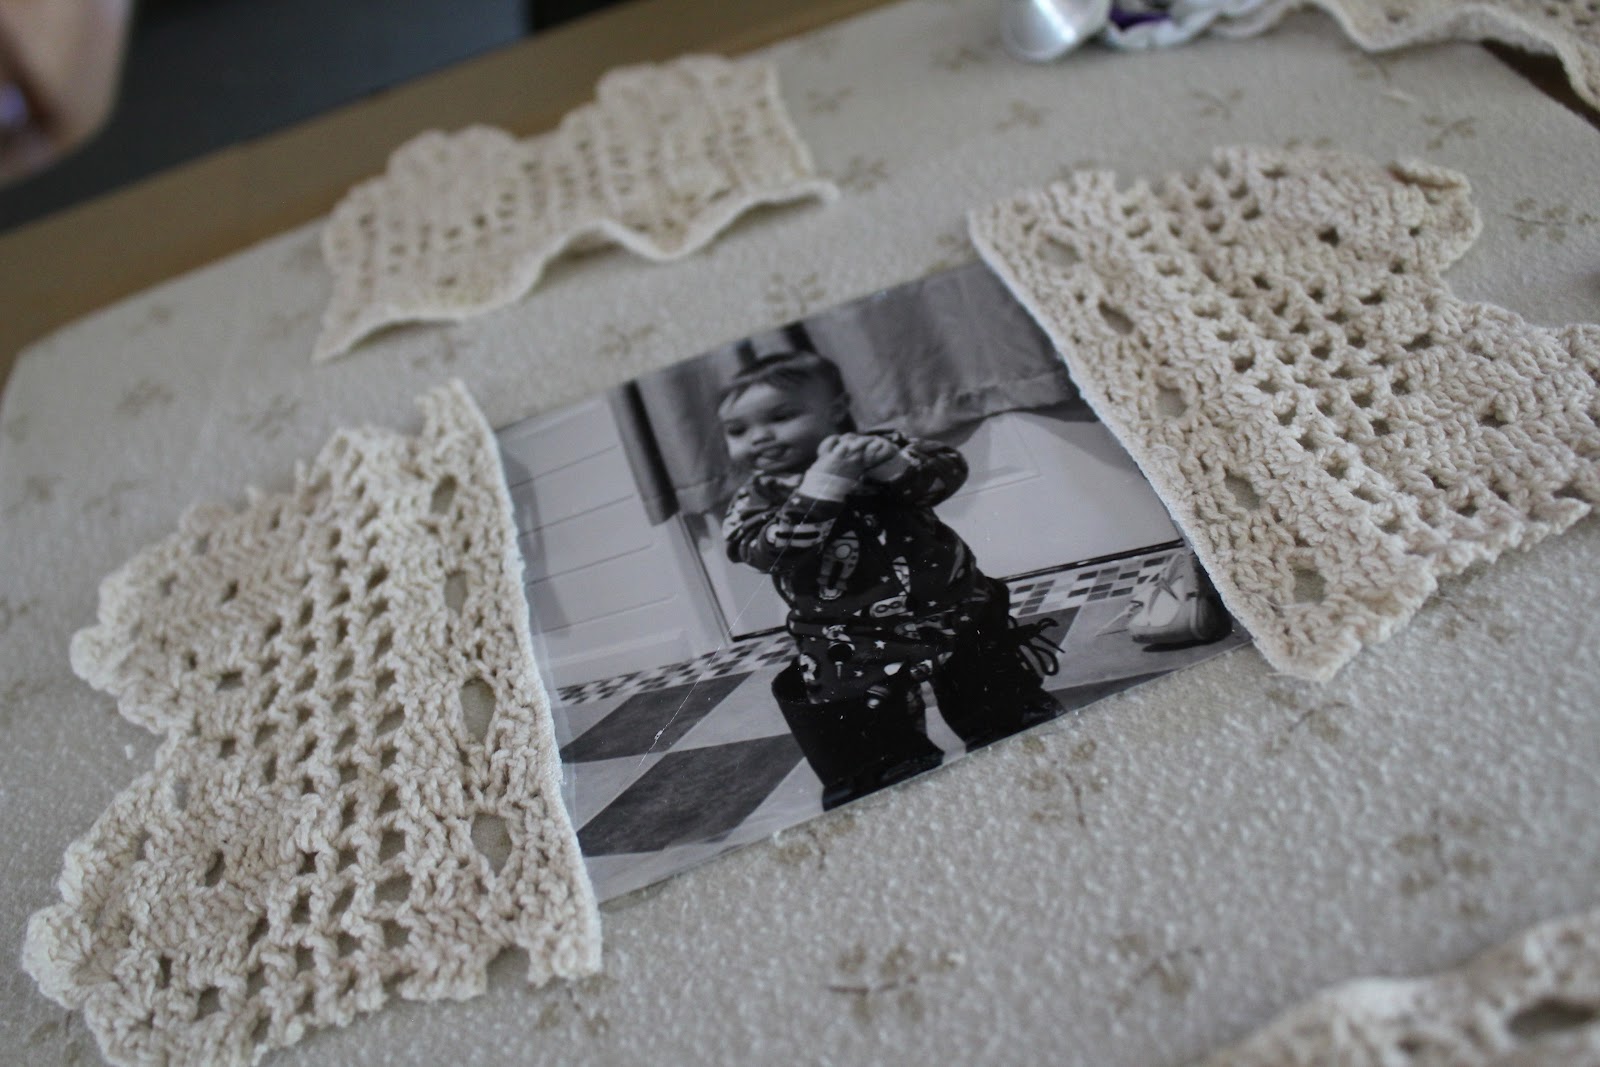

All the side pieces are now attached.. but they are overlapping. I had to cut out square pieces to get the fabric to lay properly.


Next, apply glue to the backside of the lace, or straight to the fabric to get everything to lay flat.

I then cut out corner pieces of remaining lace to complete the look.

Place glue on the fabric.. in the corner where you plan to lay the corner lace piece.

Attach! Adding more glue to areas that seem to not lay flat.

The finished look!

This project is what you make of it! The options or endless! Use your imagination, make it personal and make it count. These are memories you want forever.. so hold on to them in a secret way. One that only YOU will know.


Sincerely,
Kristin
Good blog post. I absolutely appreciate this site.
ReplyDeleteThanks!
Take a look at my page - carbohydrates diet
My developer is trying to convince me to move to .
ReplyDeletenet from PHP. I have always disliked the idea because of the expenses.
But he's tryiong none the less. I've been using Movable-type on numerous websites for about a year and am nervous about
switching to another platform. I have heard great things
about blogengine.net. Is there a way I can transfer all my wordpress posts into it?
Any help would be really appreciated!
my homepage wordpress themes design
It is really a nice and helpful piece of info. I am satisfied that you just shared
ReplyDeletethis helpful information with us. Please stay us informed like this.
Thank you for sharing.
my web site grundwehrdienst
Hi there, this weekend is fastidious in favor of me, as this occasion i
ReplyDeleteam reading this fantastic informative post
here at my home.
Here is my site ... ihk bilanzbuchhalter
Yes! Finally someone writes about sky harbor airport.
ReplyDeleteHere is my blog; ernährung logi
Great post.
ReplyDeleteAlso visit my website - Was ist die leckere und ausgesprochen einfache Diät bei Zöliakie